How Do You Make Things Look Like Theyre Glowing in Art Paper
Index
- Intro
- Sketch
- Rough Colour
- Lighting Concluding
- Sketching in Light
- Painting Lite
- Detailing
- Special Effects
- Determination
1. Intro
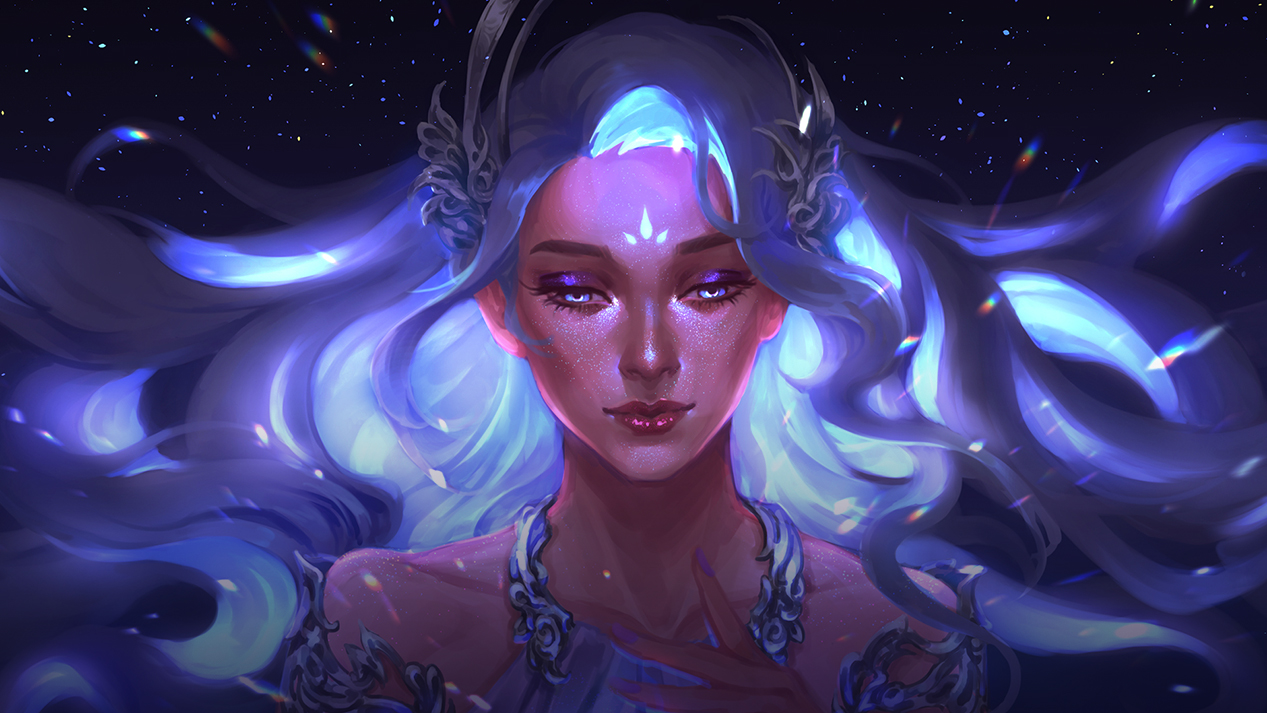
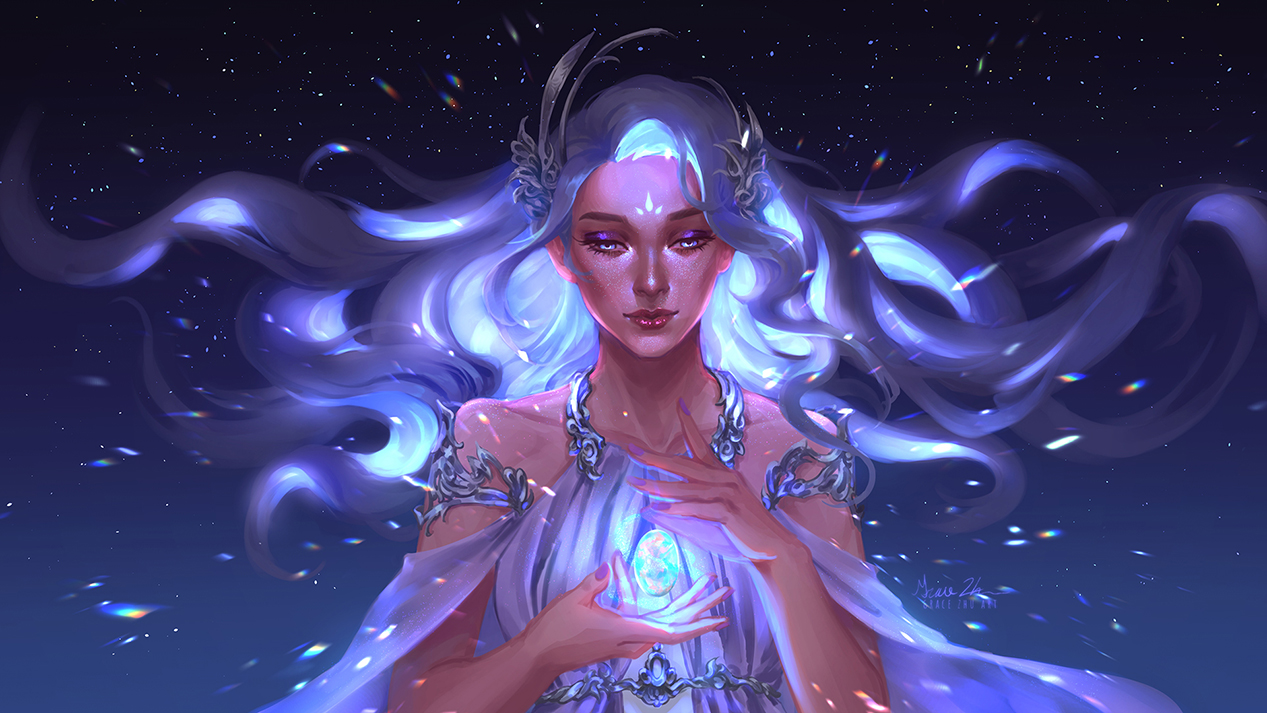
In this tutorial, I'll be walking you through how to create a magical portrait, starting from the composition to the lighting, then adding spellbinding effects to your portrait. The chief focus will exist on tips and tricks to make your portrait fantastical and eye-catching.
For this tutorial, I'yard using Clip Studio Paint, a versatile software for illustration, comics, and animation.
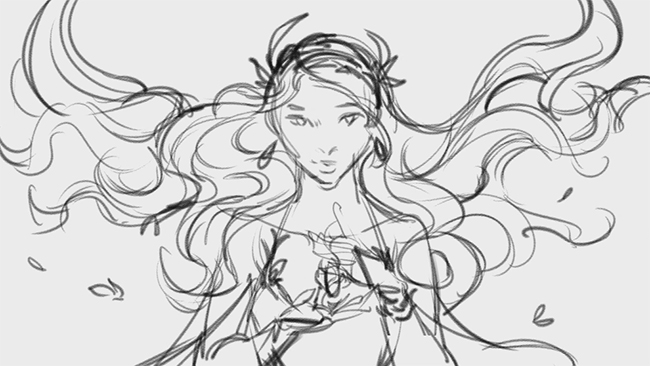
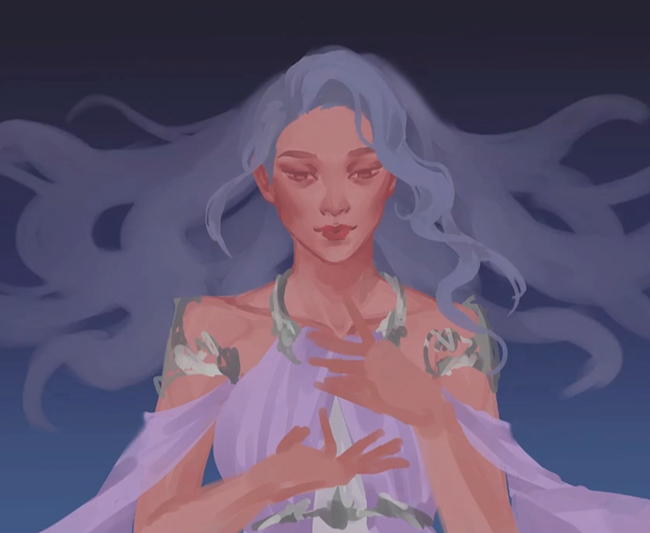
two. Sketch
To start, I went with a horizontal composition, mostly considering it's easier to show for a video. Since a horizontal limerick emphasizes horizontal lines, in this case, I decided to make the hair ane of my chief focal points and stretch it out to fill the canvas. I then settled on a symmetrical limerick to give a sense of stability, peace, and placidity. For many people, 2020 has been a tough twelvemonth and wanted to do something uplifting. All of the curved shapes likewise help emphasize repose and harmony. The choice of flowy vesture and organically-shaped accessories as well support this idea. Since all of these hold, information technology amplifies the intended effect of the limerick. I would not add direct lines to a painting similar this unless there was a good reason for it.
three. Rough Color
Sometimes I experiment with several color schemes, but I already knew roughly what I wanted for this painting. The gem in the center volition exist some sort of opal or irised quartz, a lot of calorie-free blues and pinks.
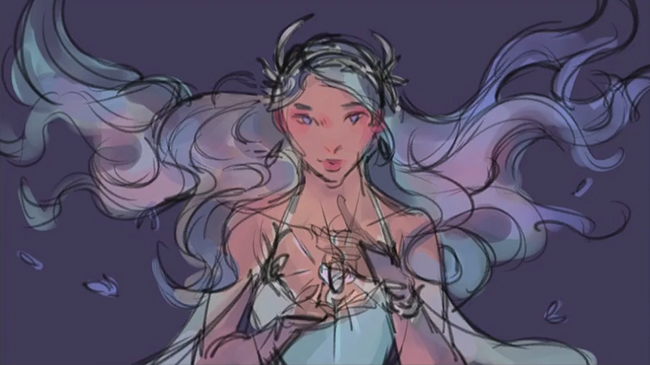
Since I'grand centering the grapheme around this crystal, a night night-themed background will suit it well. The groundwork is a natural night colour to support the feeling of tranquility. A different color could be interesting but would draw more attending to the background, which is not what I desire in this case.
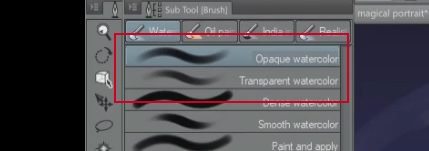
Because this question comes up a lot, I pretty much just use these brushes for the whole painting unless otherwise specified!
iv. Lighting Last
It's not always necessary, but if I'm working on something in an organized way with a item idea in heed (instead of experimenting as I get), it'south a pretty good idea to separate equally much as possible while still respecting the original idea. Painting the light separately lets me focus on only the lighting, experiment with it, and make mistakes in a piece where the lighting is extremely of import.
Nearly of the details at this level are rendered out with a soft frontal calorie-free. I continue all the values quite low because the higher values are reserved for the glow. In the color bike, this is the lower-left area of the triangle.
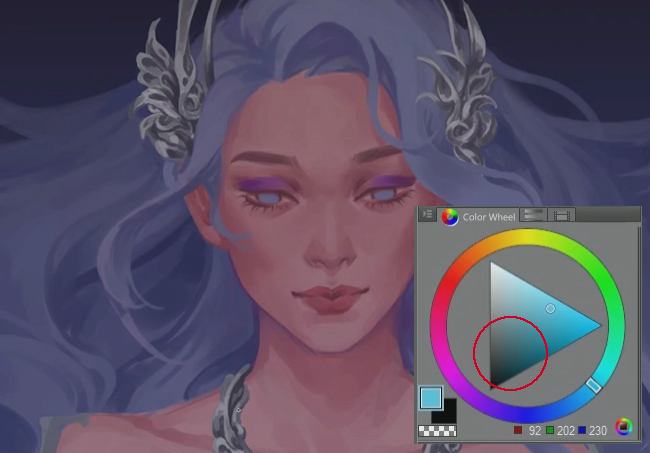
There will be another detail pass at the end. For this pass, the important affair is to have a clean base of operations to work from.
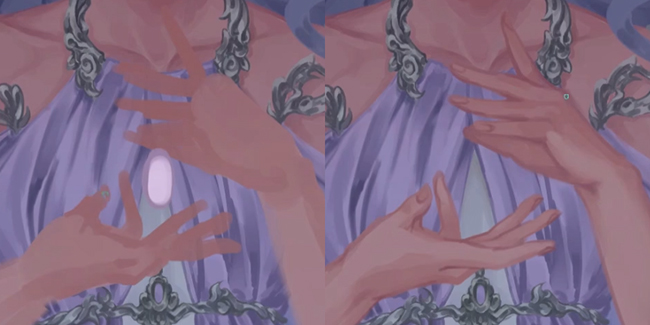
I utilise a webcam selfie as a reference for the hands. I've used this method for a long, long time, and it has never failed me. It is very reliable and a lot less embarrassing than request a friend.
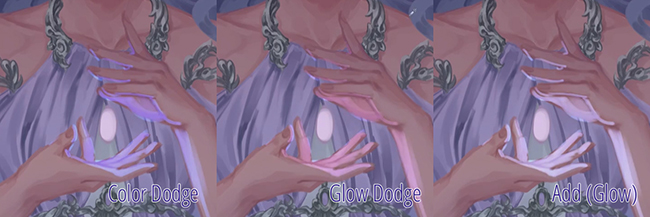
5. Sketching in Calorie-free
I roughly sketch in the desired lighting using an Add Glow layer.
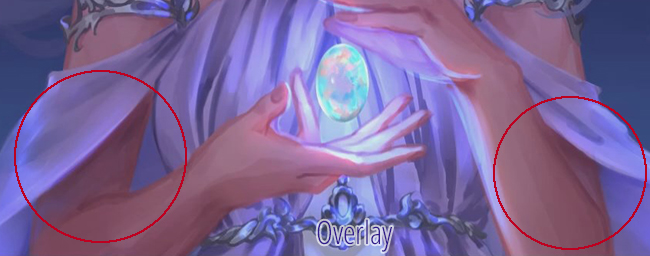
Y'all can experiment with which layer to utilize specifically (between add together and dodge), simply I thought this worked all-time for this piece. Hither's an instance of how these tin look quite dissimilar on the hands, notwithstanding even so all take the effect of making something look similar information technology is glowing.
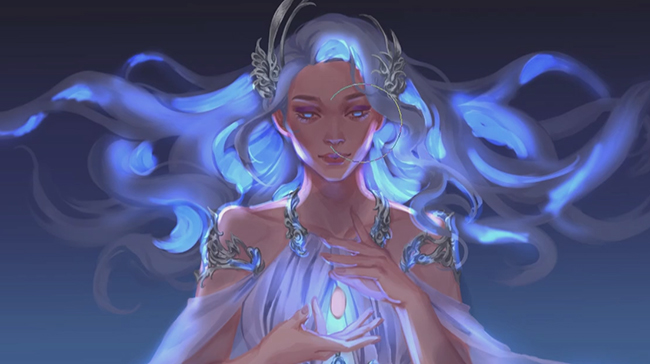
This footstep is completed on separate layers and very quickly, and once it's done, the piece starts to come together. If I zoom out and squint, the image is really eye-catching. For a magical portrait, it's essential to accept things glow for admittedly no reason at all. In this piece, I'm defining the glow as the gem and the under part of the pilus. This has the benefit of highlighting the magical floating hair, the similarly floating gem, the face, and the hands. I utilise the lighting to emphasize parts of the paradigm that I would most like the viewer to appreciate.
6. Painting Calorie-free
After sketching in light, the next pace is to clean it upwardly and get in fit the existing epitome. Sadly, this takes way longer than simply sketching in the light, but for a painting to wait polished, it's an of import step. The primal to making something glow is a mixture of hard and soft light. The actual part that glows needs to be very, very brilliant.
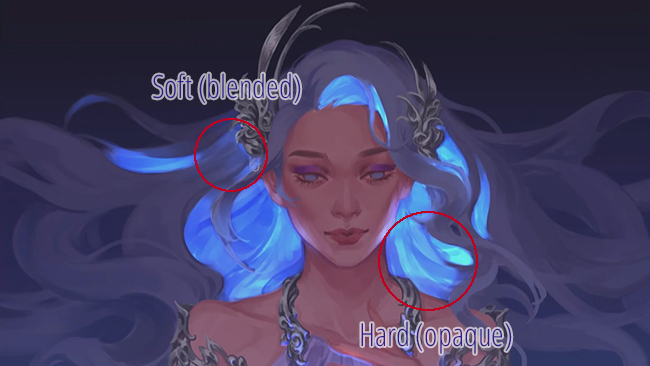
The flat-lighting image from the previous step has less dissimilarity, and all the colour values are in the lower half – in other words, they are closer to black than they are to white. I reserve the higher range for the glowing elements. This makes up the hard part of the glow. The soft function is merely taking these glowing light sources and diffusing them into the surroundings. The simplest way is to airbrush everything, but the function that will take the image to the next level is when we pay attending to materials where light is partially blocked, like article of clothing, pilus, and skin.
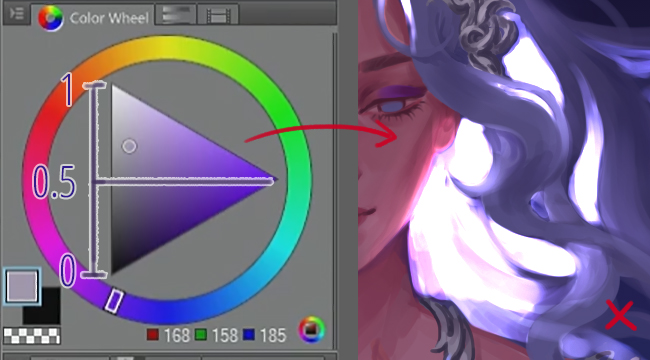
The color I utilise to paint in the Add together (or Dodge) layer is in the lower half of the color wheel value. Why? Well, the Add layer mode adds the value of that layer to all the layers underneath. My layers underneath have values up to 0.5, and if my Add layer is 0.5, and so I terminate up with values up to 1. one is the brightest you tin go in an image – if your values exceed 1, it ends upwards being over-exposed, a very common mistake. One time an image is over-exposed, information technology starts to lose item that you would have to paint back in later, merely it is like shooting fish in a barrel to suit an nether-exposed image'south effulgence.
Hither's an example of what it looks like if you lot paint in the Add together/Dodge layer with also vivid a color. You can come across a lot of the area turns pure white, losing all detail that was there earlier.
We all know that if y'all hold up your hand to the dominicus, it looks super cherry. Similar phenomena happen with hair and light fabric. I won't go also technical here, but looking at references for these phenomena and incorporating them into your painting can take an epitome from good to great. Here I add some red subsurface scattering to the hand.
The lighting needs to exist articulate when you lot're zoomed out at this stage, but the details volition exist fixed after. It's important to consider how the extremely bright light affects the residuum of the scene. The skin will be lit, the metal, textile. Additionally, the light in the hair spreads out through the balance of the hair besides. Alongside light, it may be necessary to add some additional shadow based on these new light sources. I utilize an overlay layer to shade places where I don't think these lights affect as much, adding contrast to the overall image.
7. Detailing
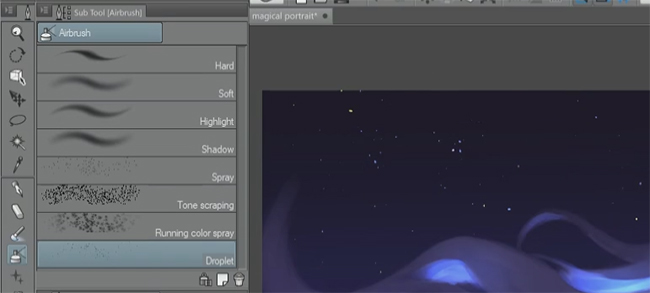
I use the Droplet airbrush to add together some stars in the background.
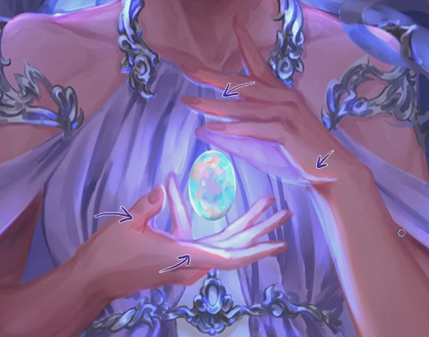
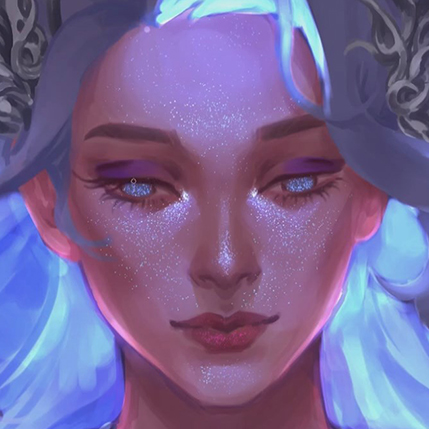
For the face, I zoomed in and brushed on some sparkle with a different airbrush. I continue to paint on Glow Dodge or Add together (Glow) layers to add more strong light to the face. Once I'k satisfied, I repeat a like process for the torso and a little on the wear.
At this point, I also take some time to clean upwards some details, such as lines and colors that aren't where they should exist. At that place'southward not much to explain here. It'southward by and large something that comes from experience. The details make the painting more than pleasant to look at over a long period of fourth dimension.
8. Special Effects
At this signal, the image is more often than not done – nosotros just need to add together the finishing touches.
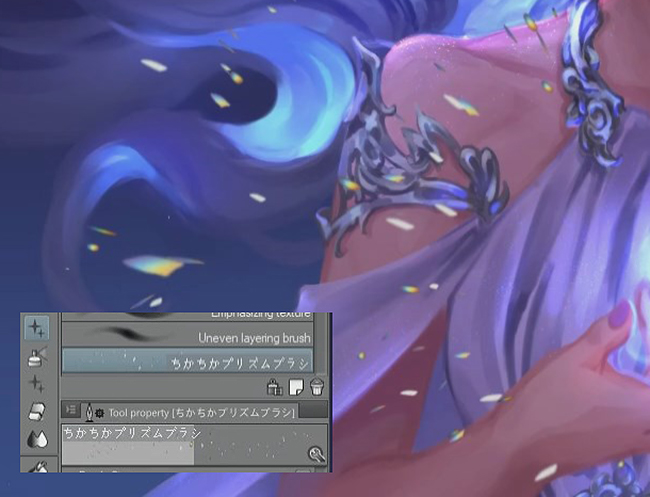
I used this castor ( https://assets.clip-studio.com/en-us/detail?id=1752622 ) from Clip Studio Assets; it has a rainbow blueprint with an iridescent wait. I use the radial mistiness to make the result look like it's coming more than from the middle of the image and set the layer blending manner to Color Dodge to arrive await like information technology'due south glowing.
9. Determination
Cheers for reading! I hope this tutorial gave you some ideas on how to make your next painting extra magical.
Grace Zhu
https://gracezhuart.com
https://twitter.com/gracezhuart
https://www.artstation.com/gracezhu
Source: https://www.clipstudio.net/how-to-draw/archives/162569
0 Response to "How Do You Make Things Look Like Theyre Glowing in Art Paper"
Post a Comment